Manual for OpenEstate-ImmoTool
Convert single-user into multi-user installation
A single-user installation can be migrated to a multi-user installation. Therefore the database has to be copied to the ImmoTool-Server and slightly modified.
Install ImmoTool-Server, if it is not installed yet (see "Installing ImmoTool-Server").
Stop ImmoTool-Server, if it is currently running.
Open the data directory of the ImmoTool-Server and create a folder
data/immotool, if it does not already exist. If the directory does already exist, remove all contained files and subfolders.Open the directory of the local project. There you should find a
datafolder. This directory contains the database files:immotool.data,immotool.lobs,immotool.propertiesandimmotool.script.Copy the database files located in step 4 into the directory created in step 3. Rename these files to
db.data,db.lobs,db.propertiesanddb.script.Start ImmoTool-Server and connect to the copied database with AdminTool. Use the username "SA" and an empty password. On the first connection with AdminTool you will be asked to enter a password for the "SA" user.
From now on the database is available for ImmoTool and AdminTool as a remote project. To finally access the database with ImmoTool you need to create a remote project (see "Connect to ImmoTool-Server").
If the migration was successfully completed and ImmoTool properly connects to ImmoTool-Server, you might remove the old directory of the local project.
Convert multi-user into single-user installation
A multi-user installation can be migrated to a single-user installation. Therefore the database has to be copied into a local project and slightly modified.
Start ImmoTool and create a new / empty local project (see "Create local project"). Into this project the database will be transferred in the next steps.
Close ImmoTool after the new / empty local project was created and opened for the first time.
Stop ImmoTool-Server, if it is currently running.
Open the directory of the local project created in step 1. The
datasubfolder should contain these files:immotool.data,immotool.lobs,immotool.propertiesandimmotool.script. Remove all files and subfolders from thedatasubfolder.Open the database directory of the ImmoTool-Server. By default you find this directory in the
data/immotoolsubfolder of the data directory. You should find these files in this folder:db.data,db.lobs,db.propertiesanddb.script. Copy these files into thedatasubfolder of the previously created project (see step 4). Rename the copied files toimmotool.data,immotool.lobs,immotool.propertiesandimmotool.script.Edit the
immotool.scriptfile from thedatafolder of the local project in a text editor.Warning
Copy a backup of theimmotool.scriptfile before making any changes. A mistake while editing may lead to a faulty database.Seach in the
immotool.scriptfile for a line starting with:CREATE USER SA PASSWORD DIGESTReplace this line with:
CREATE USER SA PASSWORD DIGEST 'd41d8cd98f00b204e9800998ecf8427e'Save the modified
immotool.scriptfile.
From now on you can open the local project with ImmoTool. All data from ImmoTool-Server is available in the local project.
In case you don't need ImmoTool-Server anymore, you might uninstall ImmoTool-Server after the migration was successfully finished.
Migrate an old project from ImmoTool 0.9.x
ImmoTool 0.9.x is already very old. It is not developed any further and can not be supported by OpenEstate anymore. Therefore it is heavily recommended to migrate the application to the latest 1.x version. This chapter describes the required steps for migration.
Notice
You should not overwrite old ImmoTool 0.9.x installation. ImmoTool 1.x has to be installed separately. In case of problems during the migration you can continue using the old version until the problem was solved.Export project from ImmoTool 0.9.x
In the first step you need to open ImmoTool 0.9.x and create a backup of the project database.
Make sure, that the latest available old version is used (at least 0.9.15 or 1.0-beta10f). Therefore click in the main menu at "Extras → Updates".
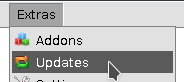
Update the old ImmoTool version
Alternatively you might download version 0.9.33 (the latest 0.9.x Version) from the OpenEstate website.
Open the project to migrate in the old ImmoTool installation and create a database backup by clicking in the main menu at "Extras → DB type → Sicherung für Version 1.x". (The translation in the application is incorrect here.)

Create a backup for ImmoTool 1.x
This will create a ZIP archive with the contents of the project database. You will need this ZIP archive in the following steps.
The next steps depend on how you want to use ImmoTool 1.x in the future (as single-user installation or multi-user installation).
Migrate into a single-user installation
If ImmoTool 1.x should be used as single-user installation, install the latest version of ImmoTool 1.x next to your old ImmoTool installation (see "Installing ImmoTool").
Warning
Do not overwrite the old ImmoTool installation! Both versions should be installed next to each other.If ImmoTool 1.x is started for the first time, the project wizard shows up. Create a new project and select the previously created ZIP file.
To-Do
Add link to the project wizard in the usage section.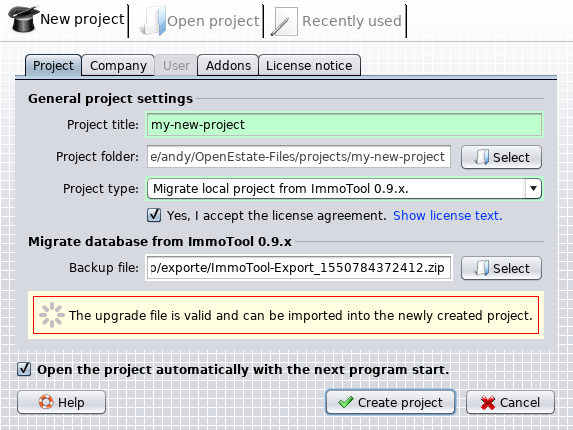
Datensicherung via Projektassistent importieren
Select as "Project type" the option "Migrate local project from ImmoTool 0.9.x". Below you can find a form, where the previously created ZIP file can be selected by clicking the "Select" button. The application will validate the ZIP file and automatically load the company information.
You might check and fix the company information and addon. Afterwards click on the "Create project" button. While the project is created the data from the ZIP file is automatically imported into the database.
Notice
After the migration was successfully finished you might remove the old installation of ImmoTool 0.9.x.Migrate into a multi-user installation
If ImmoTool 1.x should be used as multi-user installation, install the latest version of ImmoTool 1.x next to your old ImmoTool installation (see "Installing ImmoTool") and ImmoTool-Server (see "Installing ImmoTool-Server").
Warning
Do not overwrite the old ImmoTool installation! Both versions should be installed next to each other.After ImmoTool-Server was installed you can import the database backup with AdminTool into ImmoTool-Server. The previously created ZIP file can be imported via AdminTool in one of these ways:
If ImmoTool-Server is connected for the first time, you will see a window on which the previously created ZIP file can be selected.

Import ZIP file while creating the database
If the database was already created with AdminTool, you can import the ZIP file afterwards by clicking in the main menu to "Extras → Migration from ImmoTool 0.9.x".
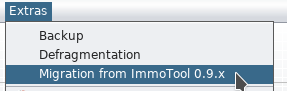
Import ZIP file after the database was created
After the contents of the ZIP file were imported the database is ready for use. Start ImmoTool 1.x and create a remote project in order to connect to the database (see "Connect to ImmoTool-Server").