Manual for OpenEstate-ImmoTool
AdminTool
AdminTool is a helper application for administrators to manage ImmoTool databases. In most cases the application is used in conjunction with multi-user installations - e.g.
- to prepare a new database to make it usable for ImmoTool,
- to manage user accounts in the database,
- to set permissions for database users or
- to execute commands on the database.
Starting AdminTool
AdminTool is installed together with the ImmoTool application (see "Installing ImmoTool").
Start AdminTool on Windows
You can find a folder called "OpenEstate-ImmoTool" in the start menu, that contains a shortcut to start AdminTool.
Besides this you may start the application by executing the AdminTool.exe (or ImmoTool.bat) file in the bin subfolder of the application directory.
Start AdminTool on macOS
Open the application bundle called "OpenEstate-ImmoTool" with a double click. This will open a Finder window with the applications provided by ImmoTool.
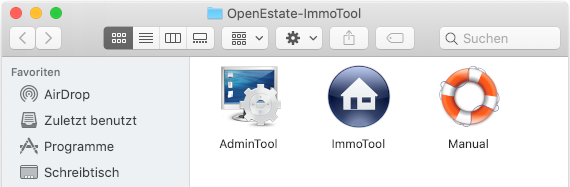
Finder window with ImmoTool applications
To-Do
Provide an English screenshot.A double click on the "AdminTool" application will start the application.
Tip
You may integrate the "AdminTool" application symbol into the Dock for future application starts (see documentation by Apple).Besides this you may start the application by executing the AdminTool.sh file in the bin subfolder of the application directory.
Start AdminTool on Linux
If ImmoTool was installed with the Debian package, you will find an entry called "OpenEstate-AdminTool" in your start menu.
If ImmoTool was installed with the TAR.GZ package, you may have to start the StartMenuAdd.sh script in the bin subfolder of the application directory in order to create the start menu entry for AdminTool.
Alternatively you may start the application by executing the AdminTool.sh script in the bin subfolder of the application directory.
Connecting with a database
If AdminTool was started, you will see the following dialog window. You need to enter the connection settings for the database into this window.
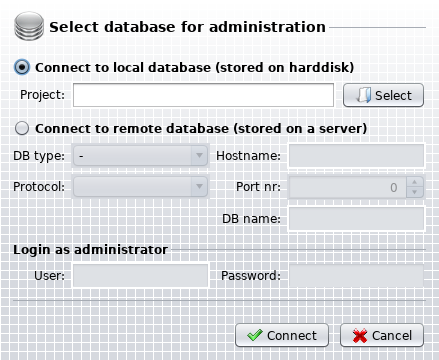
Connecting with a database via AdminTool
There are two possible ways to connect with a database via AdminTool.
Connect via project folder
You may connect to a database of a previously created project (single-user or multi-user). In this case you need to select the project directory on the hard drive by clicking the button "Select".

Connect to database via project folder
In this case AdminTool will use the connection settings provided by the selected project.
If the folder of a remote project (multi-user installation) was selected, you will also have to enter the login credentials of the database administrator into the "User" and "Password" field. In most cases the user name of the database administrator is "SA".
Connect via explicit configuration
You may also connect to a database by explicitly entering the connection settings.
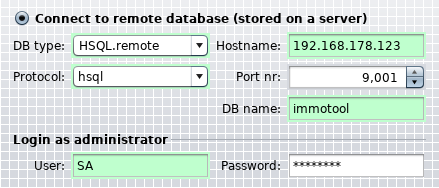
Connect to database via explicit configuration
The following settings can be entered:
DB type:
Select the option "HSQL.remote".Protocol:
In normal case you should select the option "hsql". If the ImmoTool-Server was configured for SSL encryption, you have to select the option "hsqls" (see "Configure SSL encryption").Hostname:
Enter the IP address or hostname of the computer, on which ImmoTool-Server was installed. In case AdminTool was started from the same computer you can keep the hostname "localhost" untouched.Port nr:
By default the port number is "9001". Only if ImmoTool-Server was configured for another port number, this value has to be changed.DB name:
By default the name of the database is "immotool". Only if another database with another name was configured in ImmoTool-Server, this value has to be changed.User:
The login name of the database administrator is "SA". In most cases this value has not to be changed.Password:
If a first connection to the ImmoTool-Server is established, this value can stay empty. After a password was set for the database administrator it has to be entered here.
Toolbar
AdminTool shows a toolbar on top with the following button.
Toolbar of AdminTool
Open DB:
Open a new connection to a database. A currently opened database connection will be closed.Close DB:
Close the connection to the current database.Refresh:
Reload all tabs shown in the AdminTool.
Edit company data
After a database connection was established you can find the "Agency" tab, which shows the currently used company data / logo. You may edit these settings within this tab.
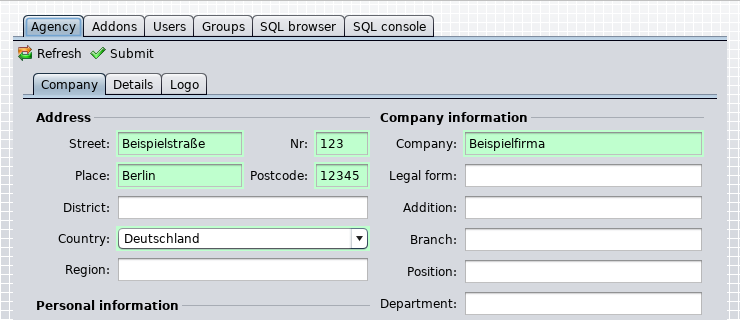
Edit company data
- Click within the tab on the "Refresh" button in order to reload all company data from the database.
- Click within the tab on the "Submit" button in order to save modified company data to the database.
Manage addons
After a database connection was established you can find the "Addons" tab, which shows information about currently used addons.
- Click within the tab on the "Refresh" button in order to reload addon information from the database.
Manage installed addons
The tab "Installed addons" shows a tabular view of addons, that are currently installed in the project database.
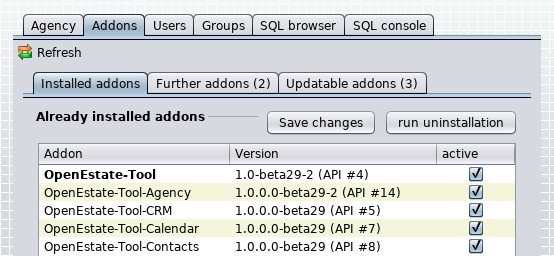
Table of currently installed addons
Enable / Disable addons
An addon has to be enabled by the administration in order to make it available for database users within the project.
You may enable or disable an addon by clicking into the "active" table column. After clicking the "Save changes" button the settings are saved into the database.
Uninstall addons
Select the addon to uninstall from the table by selecting its table row. Afterwards click on the "Run uninstallation" button in order to remove the selected addon from the database completely.
Warning
Uninstalling an addon from the database means, that all of its previously stored data is being removed from the database.Install further addons
An addon can be available in the ImmoTool plugin directory, but it might not installed into the database yet. Those addons are shown in the table within the "Further addons" tab.
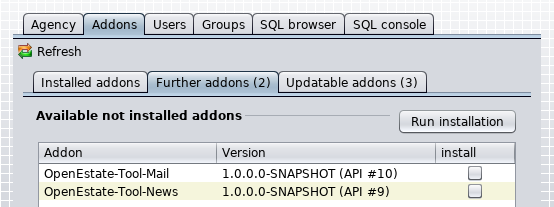
Table of further addons
You may install those addon by clicking into the "Install" table column. After clicking the "Run installation" button the addons are installed into the database.
Update addons
The tab "Updatable addons" shows a tabular view of addons and extensions, that are already installed into the database but need to be updated because a newer version is available on the hard drive.
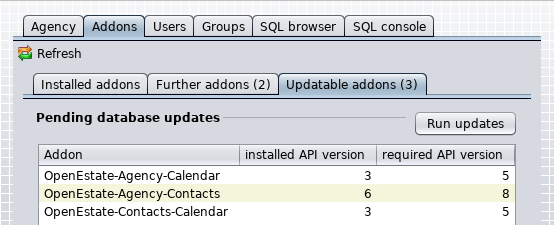
Table of updatable addons
In order to install an available update select the corresponding table rows and click on the "Run updates" button.
Notice
An addon or extension is only usable within ImmoTool, of the installed API version is equal to the required API version by the addon on the hard drive.Manage user accounts
After a database connection was established you can find the "Users" tab, which provides user management. On multi-user installations you configure any number of users, that may work on the database at the same time.
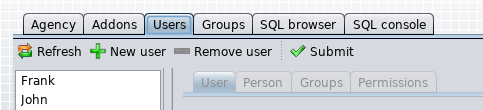
Manage user accounts
On the left side of the tab there is a list of user accounts, that are currently registered in the database. Click on one of these accounts in order to manage their settings.
On the right side of the tab the information about the currently selected user account is shown.
The following action buttons are available on the top of the tab:
- Click on the "Refresh" button in order to reload user information from the database.
- Click on the "New user" button in order to create a new user account.
- Click on the "Remove user" button in order to remove the selected user account.
- Click on the "Submit" button in order to permanently save all previously made modifications.
Notice
After any modification you need to click the "Submit" button. Otherwise these changes are not stored into the database.General user data
If a user account was selected for modification, its general data is shown on the right side in the "User" tab.
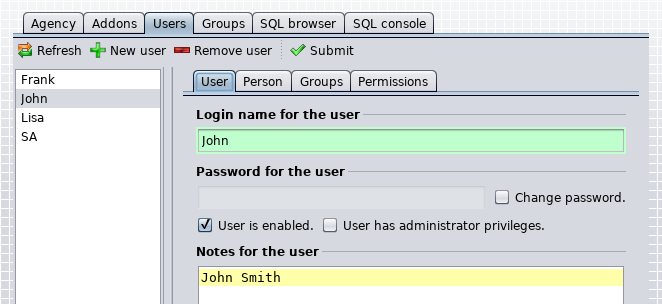
General data of an user account
Login name for the user:
This name is used by the user in order to login at the database. The chosen name has to be unique within the database / project.Password for the user:
This password is used by the user in order to login at the database. Enable the checkbox "Change password" to change a previously saved password afterwards.User is enabled:
This checkbox has to be selected, in order to allow the user to login at the database. If this checkbox is enabled, the user will automatically become a member of the "IMMOTOOL" group.User has administrator privileges:
Enable this option in order to grant all permissions in the database to the user. An administrator can access all data, may add other user accounts, may install addons, etc. It is not necessary to assign any permissions to an administrator because he owns all permissions by default.Notes for the user:
You may enter some internal notes about the user account into this text field.Effective permissions:
This table shows the effective permissions of the user. This includes permissions, that have been directly assigned to him or that he has gotten by his group memberships.
Warning
If the database of a single-user installation is managed in AdminTool, you should not change the password of the "SA" user. In this particular case the password should always be empty.Personal user data
If a user account was selected for modification, its personal data is shown on the right side in the "Person" tab.
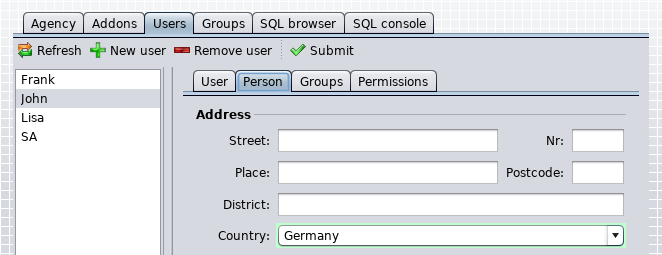
Personal data of an user account
Notice
The user might change his personal data via ImmoTool by himself, if he has the required permissions.User memberships
If a user account was selected for modification, its group memberships are shown on the right side in the "Groups" tab.
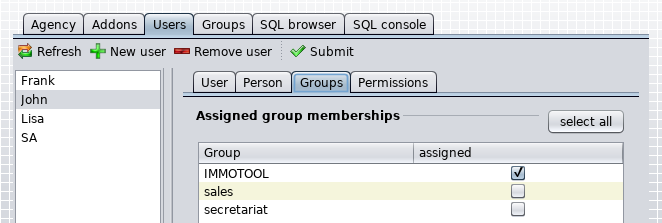
Group memberships of an user account
The table shows the groups, that are currently available in the database. By clicking on the checkbox in the "assigned" column you might assign one or more groups to the user.
Notice
The user gains all permissions, that have been assigned to the groups of his memberships.Notice
The user automatically becomes a member of the "IMMOTOOL" group, if his account was activated in the "User" tab.User permissions
If a user account was selected for modification, its permissions are shown on the right side in the "Permissions" tab.
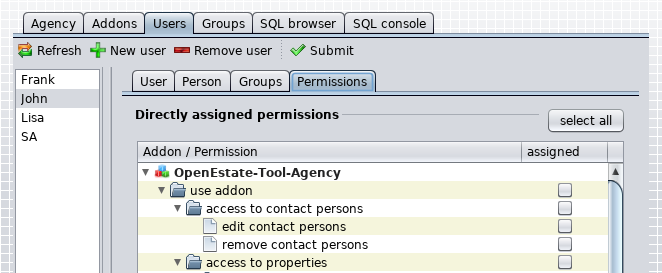
Permissions of an user account
The table shows the permissions, which are defined by installed addons. By clicking on the checkbox in the "assigned" column you might assign one or more permissions to the user.
Tip
Instead of explicitly assigning permissions to a certain user, its often a better way to use user groups. In this case the permissions only have to be set once for the group. Each user, who becomes a member of the group, will automatically gain these permissions.Manage user groups
After a database connection was established you can find the "Groups" tab, which provides group management.
Generally you can combine multiple users into multiple groups. By becoming a member of a group a user will automatically gain all permissions, that were assigned to the group.
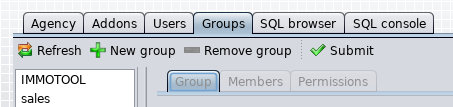
Manage user groups
On the left side of the tab there is a list of groups, that are currently registered in the database. Click on one of these groups in order to manage their settings.
On the right side of the tab the information about the currently selected user group is shown.
The following action buttons are available on the top of the tab:
- Click on the "Refresh" button in order to reload group information from the database.
- Click on the "New group" button in order to create a new user group.
- Click on the "Remove group" button in order to remove the selected user group.
- Click on the "Submit" button in order to permanently save all previously made modifications.
Notice
After any modification you need to click the "Submit" button. Otherwise these changes are not stored into the database.General group data
If a user group was selected for modification, its general data is shown on the right side in the "Group" tab.
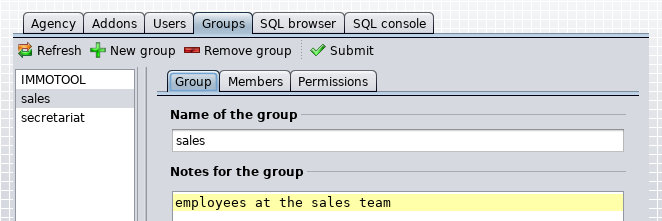
General data of an user group
Name of the group:
Enter a proper name, that describes the user group. The chosen name has to be unique within the database / project.Notes for the group:
You may enter some internal notes about the user group into this text field.
Assign user accounts
If a user group was selected for modification, its group members are shown on the right side in the "Members" tab.

Members of an user group
The table shows the user accounts, that are currently available in the database. By clicking on the checkbox in the "assigned" column you might assign one or more users to the group.
Group permissions
If a user group was selected for modification, its permissions are shown on the right side in the "Permissions" tab.
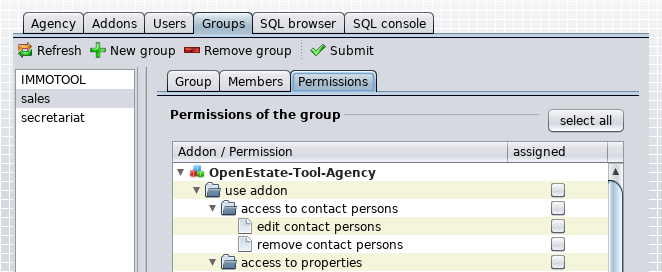
Permissions of an user group
The table shows the permissions, which are defined by installed addons. By clicking on the checkbox in the "assigned" column you might assign one or more permissions to the group.
Browse database contents
After a database connection was established you can find the "SQL browser" tab, which provides read access to the raw database contents (tables, views and stored procedures).
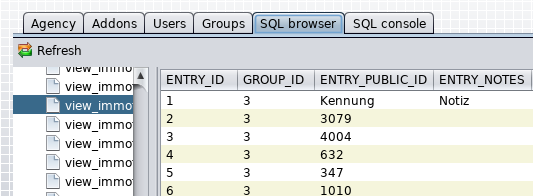
Browse database contents
This tab does not provide any special functionality. It might only be helpful for a database review.
Execute SQL commands
After a database connection was established you can find the "SQL console" tab, which allows the execution of SQL commands on the database.
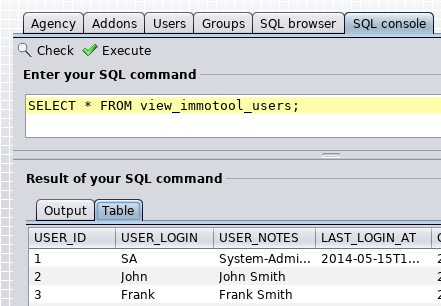
Execute SQL commands via AdminTool